 QuickBooks
Preferences
QuickBooks
Preferences
The QuickBooks preferences tab is where you will come to
fully integrate your QuickPractice file with your QuickBooks software. For more
detailed instructions on how to use QuickBoooks integration, click
here.
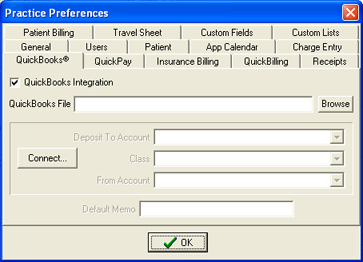
Refer to the following
screenshot and table as a reference for determining how each field works in the
process of integrating QuickPractice with your QuickBooks class file.
- QuickBooks
Integration - Check to initiate the Quick Books
integration installation.
- QuickBooks
File/Browse - Click "Browse" to navigate to your
QuickBooks database file. (For Example: "C:\Program
Files\QuickBooks\quickbooksfile.qbw").
- Deposit to
Account - Specify the deposit account you want
to send your QuickPractice payments to.
- Class
- Specify the class.
- From Account
- Click to print the words "Signature on
File" into box 31.
- Default Memo
- Toggle on/off the option to add a date next to the
signature in box 31.
- Connect -
Click to specify which side of the CMS-1500 form to
print the insurance carriers address to (only works for 12/90
version). Click "blank" to leave insurance carrier's address off
the top of the claim form.
| |
|